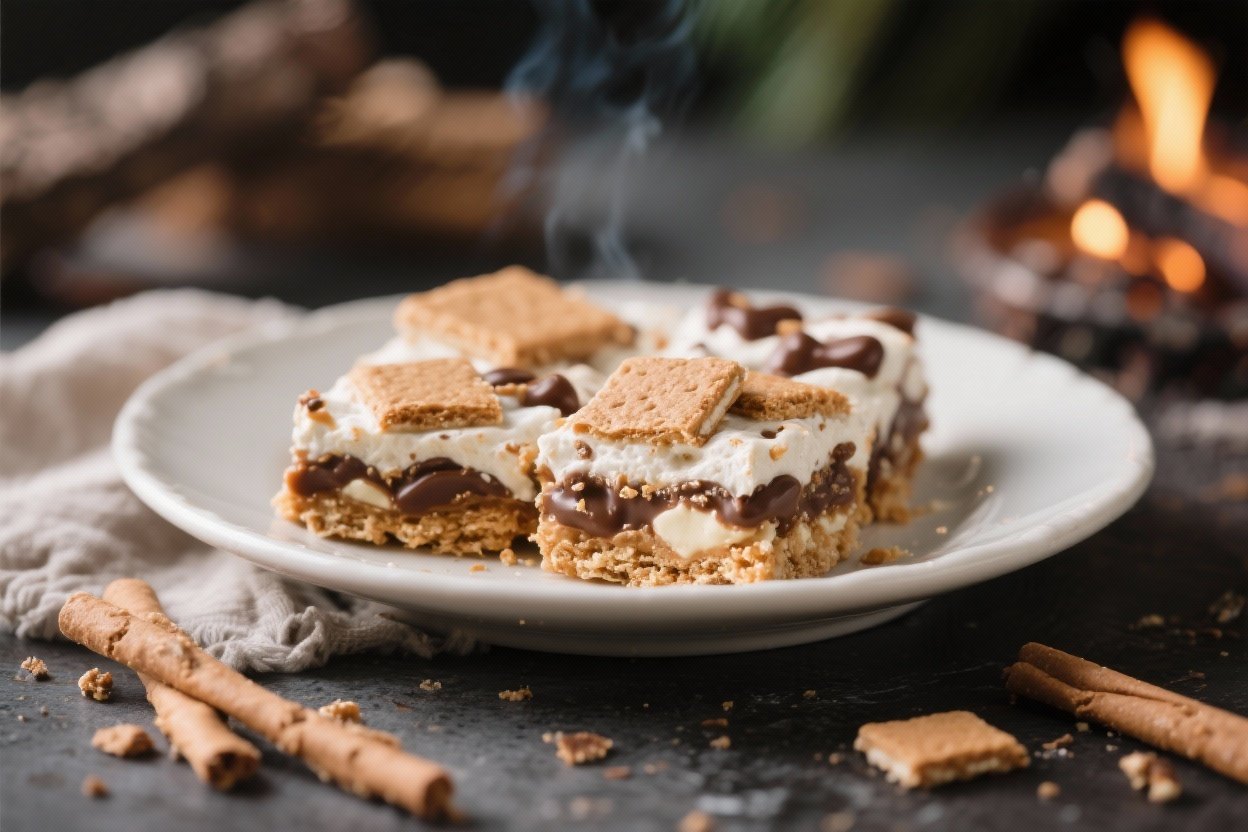
Easy S’more Bars Recipe (No Campfire Needed!) – Gooey, Crispy, 30-Minute Bliss
You know that moment when a late-night sweet tooth hits and your kitchen suddenly becomes a campsite? That’s this recipe. These Easy S’more Bars give you all the molten chocolate, toasted marshmallow, and buttery graham crunch without smelling like smoke or finding ash in your dessert.
No skewers, no tent, just a pan and a plan. Warning: you may “taste-test” half the tray before it cools. Your future self will understand.
Why You’ll Love This Recipe
- Campfire vibes, zero hassle: Everything bakes in one pan. No flames, no bug spray, no extra laundry.
- Ridiculously fast: Prep in under 10 minutes; done in about 30. Dessert shouldn’t be complicated.
- Perfect texture: Buttery graham crust + melty chocolate + toasty marshmallow = win.
- Minimal cleanup: One bowl, one pan. Your sink will thank you.
- Kid-friendly and party-proof: Sliceable squares travel well and vanish fast at potlucks.
Shopping List – Ingredients
- Graham crackers: 2 cups fine crumbs (about 16 full sheets)
- Unsalted butter: 1/2 cup (1 stick), melted
- Brown sugar: 1/3 cup, packed
- Kosher salt: 1/4 teaspoon
- Milk chocolate bars: 12 ounces, chopped (Hershey’s-style for classic flavor)
- Mini marshmallows: 4 cups (about 8 ounces)
- Vanilla extract: 1 teaspoon (optional, but lovely)
- Flaky sea salt: A pinch for finishing (optional, but highly recommended)
- Nonstick spray or parchment: For lining the pan
Cooking Instructions

- Prep your pan: Heat oven to 350°F (175°C). Line a 9×13-inch baking pan with parchment, leaving a little overhang for easy lifting. Lightly spray.
- Build the crust: In a mixing bowl, combine graham crumbs, melted butter, brown sugar, and salt. Stir until the texture feels like damp sand.
- Press it down: Firmly press the crumb mix into an even layer in the pan. Use the bottom of a measuring cup to compact it so it doesn’t crumble later.
- Bake the base: Bake for 8–10 minutes until just set and lightly golden. This locks in the crunch.
- Add chocolate: While the crust is hot, scatter chopped milk chocolate evenly on top. Let it sit 2 minutes, then gently spread into a glossy layer. Stir in vanilla with the melted chocolate if using.
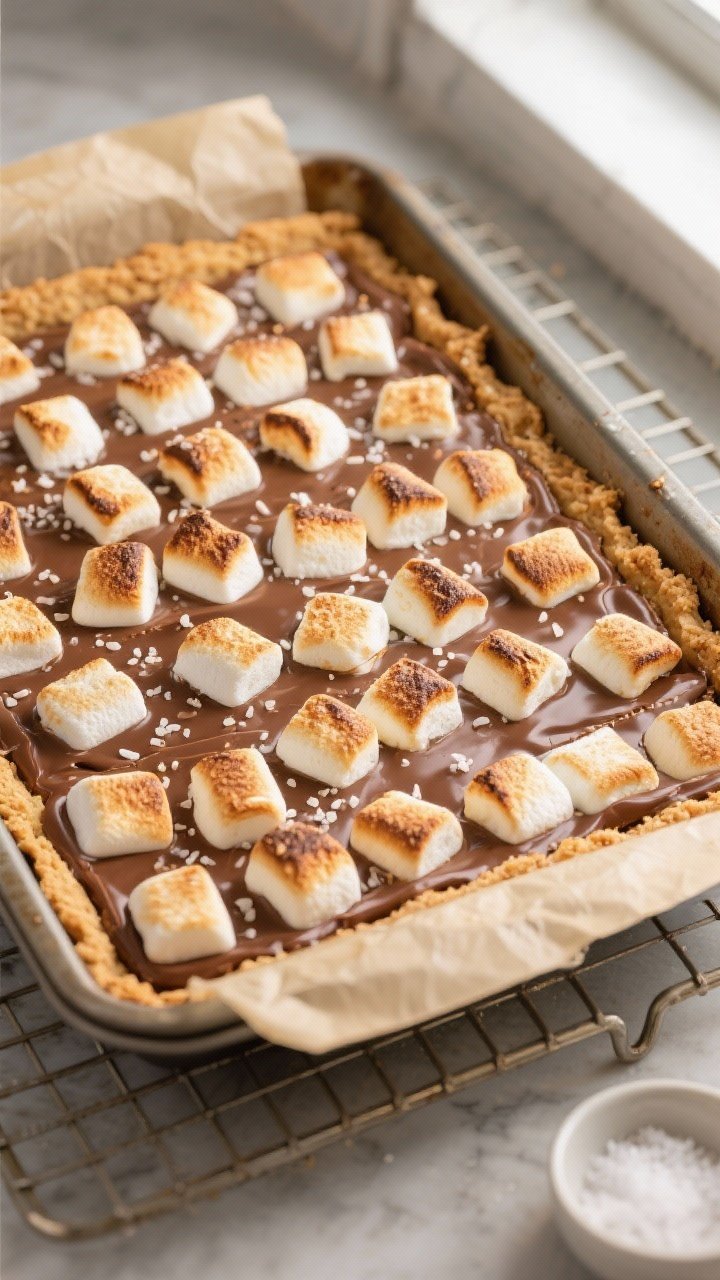
- Marshmallow magic: Sprinkle mini marshmallows evenly over the chocolate. Don’t pack too tightly – space helps them puff and toast.
- Toast time: Return pan to oven for 8–10 minutes until marshmallows are puffed and golden. For deeper toast, broil on high 15–30 seconds – watch like a hawk.
- Finish and set: Immediately sprinkle with a pinch of flaky sea salt. Cool 20–30 minutes at room temp, then chill 15 minutes if you want cleaner slices.
- Slice and serve: Lift out using the parchment and cut into bars with a sharp, lightly oiled knife. Wipe the blade between cuts for neat edges. Try not to inhale them all. Emphasis on “try.”
Preservation Guide
- Room temperature: Store in an airtight container up to 2 days. The marshmallows may soften a bit – still delicious.
- Refrigerator: Keeps 4–5 days. The chocolate firms up; let bars sit 10 minutes before eating for best texture.
- Freezer: Freeze cut bars on a sheet pan until solid, then bag for up to 2 months. Thaw at room temp 30–45 minutes. FYI, marshmallows get slightly chewier after freezing – still a vibe.
- Reheat: For “freshly toasted” feels, warm a bar in a 300°F oven for 4–5 minutes or microwave 8–10 seconds.
Why This is Good for You
- Built-in portion control: Bars beat a free-pour of chocolate chips at midnight. A square hits the craving and lets you move on.
- Mindful indulgence: Satisfying textures and flavors (sweet, salty, crunchy, gooey) reduce the urge to keep hunting for more snacks.
- Energy on demand: Carbs from grahams and marshmallows give quick fuel. Not a kale salad, but perfect for celebrations or post-hike treats.
- Customizable ingredients: Swap in darker chocolate for antioxidants, or whole-grain grahams for fiber. Small tweaks, better balance.
Pitfalls to Watch Out For
- Loose crust: If you don’t compact the graham base firmly, it crumbles. Press hard—commit to the press!
- Scorched tops: Broilers move fast. Marshmallows go from golden to “campfire tragedy” in seconds. Don’t blink.
- Chocolate seize: Spreading chocolate before it melts can cause tearing. Wait 2 minutes on the hot crust, then spread gently.
- Sticky slicing: Marshmallows cling. Oil your knife and wipe between cuts. Patience beats marshmallow glue.
- Uneven layers: Piling marshmallows too thick leads to slide-city. One even layer is enough for gooey perfection.
Mix It Up
- Dark side: Use 60–70% dark chocolate for a richer, less sweet bar. Add orange zest to the melted chocolate for a classy twist.
- Peanut butter cup: Drizzle 1/3 cup warmed peanut butter over the chocolate before marshmallows. Sprinkle chopped peanuts on top.
- Salted caramel: Swirl 1/4 cup thick caramel sauce into the chocolate layer. Finish with extra flaky salt. Chef’s kiss.
- Cookie crunch: Mix 1/2 cup mini chocolate chips or crushed pretzels into the graham crust for surprise bites.
- Gluten-free: Use certified GF graham crackers. Everything else stays the same – easy win.
- S’more-stacked: Press a few extra graham cracker pieces into the marshmallow top right after baking for a chunky, rustic look.
FAQ
Can I use regular marshmallows instead of mini?
Yes. Slice large marshmallows in half and place cut-side down for better stick.
They’ll puff more dramatically and may need an extra minute to toast.
What chocolate works best?
Milk chocolate nails the classic flavor, but semi-sweet or dark chocolate gives a more grown-up edge. Use bars over chips if possible—bars melt smoother because chips contain stabilizers.
How do I prevent the crust from sticking?
Line the pan with parchment and leave an overhang. Also, cool for at least 20 minutes before lifting.
Rushing is the enemy of clean exits, IMO.
Can I make these ahead for a party?
Absolutely. Bake the day before, cool, slice, and store airtight. For that fresh-toasted taste, warm briefly in the oven before serving.
What if I don’t have a 9×13 pan?
Use a 9×9 pan and reduce thickness as needed, or scale the recipe down by one-third.
If using 9×9 with full amounts, extend baking a couple minutes and expect a thicker bar.
Are they overly sweet?
They’re a dessert classic, so yes—sweet, but balanced. Use dark chocolate, a pinch of sea salt, and slightly reduce brown sugar in the crust to dial it back.
Can I add protein or make them “healthier”?
You can mix 1–2 tablespoons almond flour into the crust for body or swap half the chocolate for dark. But keep the spirit of the treat—balance over perfection.
How do I get perfectly toasted tops without burning?
Bake until golden, then broil 15–30 seconds, watching continuously.
Rotate the pan if your broiler has hot spots. The line between perfect and “whoops” is thin.
Final Thoughts
S’mores were never meant to be complicated – just unforgettable. These bars deliver campfire nostalgia with weeknight convenience, and the results are gooey, crisp, and absurdly satisfying.
Customize the chocolate, add a swirl, or keep it classic – either way, you’ll be the hero of dessert o’clock. Now go claim that corner piece before someone else does.
Printable Recipe Card
Want just the essential recipe details without scrolling through the article? Get our printable recipe card with just the ingredients and instructions.